How to make Halloween-themed treats
 <a href="https://conantcrier.com/byline/michelle-zhang/" rel="tag">Michelle Zhang</a> | Conant Crier
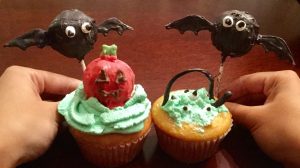
 Here are some sweet treats for a sweet-filled holiday.
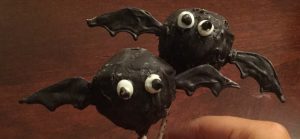
Bat Pops
 <a href="https://conantcrier.com/byline/michelle-zhang/" rel="tag">Michelle Zhang</a> | Conant Crier
 Materials
- Undecorated Cake Pops
- Cake Pop Sticks
- Black Candy Melts
- White Candy Melts
- Ziploc Bags
- A Small Bowl
- Parchment Paper
- Paper
- Pencil
- Toothpick
Procedure
1. Melt ½ cup of black candy melts in a bowl and ¼ in a Ziploc bag by microwaving them at 30 second intervals while stirring/kneading in between. Once this has been done, cut off a small corner of the ziploc bag so that it can act as a piping bag.
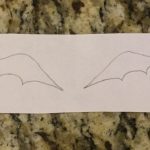
2. Draw a pair of bat wings(each should be about 5cm wide and 2.5cm tall) on a slip of paper with a pencil.
 <a href="https://conantcrier.com/byline/michelle-zhang/" rel="tag">Michelle Zhang</a> | Conant Crier
 3. Tape this drawing to a clean surface.
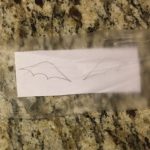
4. Cover it in clear plastic wrap. This will prevent the graphite from the pencil from coming into contact with the food.
 <a href="https://conantcrier.com/byline/michelle-zhang/" rel="tag">Michelle Zhang</a> | Conant Crier
 5. Cut several pieces of parchment paper that are slightly larger than your slip of paper.
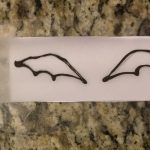
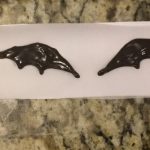
6. The outline of the bat wings should be visible through the parchment paper. Trace the outline and then fill it in using the melted candy in the ziploc bag. Set aside to dry. Continue making as many as you need.
 <a href="https://conantcrier.com/byline/michelle-zhang/" rel="tag">Michelle Zhang</a> | Conant Crier
  <a href="https://conantcrier.com/byline/michelle-zhang/" rel="tag">Michelle Zhang</a> | Conant Crier
 7. Insert the end of one cake pop stick about mid-way through an undecorated cake pop, and then remove
8. Dip one end of the cake pop stick into the melted candy in the bowl and reinsert into the cake pop. This will help prevent the cake pop from sliding off the stick.
9. Repeat steps 2 and 3 for your remaining cake pops. Melt more candy if necessary.
10. Once the candy between the stick and cake pop has dried, dip the cake pop into the bowl of melted candy and fully coat it in black. Set aside to dry, and repeat with the rest of your cake pops.
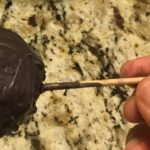
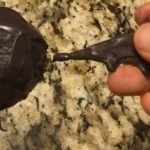
11. Use a toothpick to make a slit on the side of a dried cake pop. Then dip the end of a wing into melted candy and insert it into the slit. Repeat on other side.
 <a href="https://conantcrier.com/byline/michelle-zhang/" rel="tag">Michelle Zhang</a> | Conant Crier
  <a href="https://conantcrier.com/byline/michelle-zhang/" rel="tag">Michelle Zhang</a> | Conant Crier
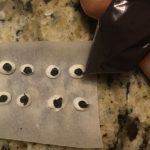
 12. To make the eyes, melt white candy melts in a Ziploc bag and then cut off a small corner. Pipe out a pair of small circles on a piece of parchment paper and then smaller black circles within each of them using melted black candy.
 <a href="https://conantcrier.com/byline/michelle-zhang/" rel="tag">Michelle Zhang</a> | Conant Crier
 13. Once the eyes have dried, use a toothpick to spread some melted black candy on the back side. Then attach it to the cake pop.
14. Then admire and enjoy your Bat Pops!
Witch’s Cauldron
 <a href="https://conantcrier.com/byline/michelle-zhang/" rel="tag">Michelle Zhang</a> | Conant Crier
 Materials
- Undecorated Cupcakes
- Whipped Cream(see bottom for recipe)
- Food Coloring
- Black Candy Melts
- Ziploc Bag
- Two Small Bowls
- Knife
- Parchment Paper
Procedure
1. Use the knife to cut out a circular piece from the center of the cupcake.
 <a href="https://conantcrier.com/byline/michelle-zhang/" rel="tag">Michelle Zhang</a> | Conant Crier
 2. Place the cut out piece in a small bowl and crumble it in between your hands. Set aside.
3. Put a ½ cup of whipped cream into the other small bowl, and add two to three drops of green food coloring.
4. Add the cupcake crumbs to the whipped cream, and mix them together.
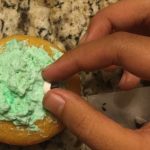
Fill the hole in the cupcake with this mixture of whipped cream and crumbs.
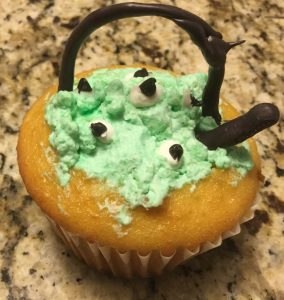
5. Make some eyes out of candy melts by melting white candy melts (melting directions in step 1 of Batty Pops) in a Ziploc bag and then cutting off a small corner. Do the same for black candy melts. Pipe out a pair of small circles on a piece of parchment paper and then smaller black circles within each of them using melted black candy.
6. Once they have dried, spread them out on top of the whipped cream.
 <a href="https://conantcrier.com/byline/michelle-zhang/" rel="tag">Michelle Zhang</a> | Conant Crier
 7. Use black candy to pipe out a thick black line on a piece of parchment. This will be the “stirring rod” in the witch’s cauldron.
8. Insert the stirring rod in the whipped cream, on the side.
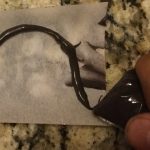
9. Pipe out a tall black arch using the candy. Once it has dried, insert it into the whipped cream so that it spans over the “content of the cauldron.”
 <a href="https://conantcrier.com/byline/michelle-zhang/" rel="tag">Michelle Zhang</a> | Conant Crier
  <a href="https://conantcrier.com/byline/michelle-zhang/" rel="tag">Michelle Zhang</a> | Conant Crier
 10. Then enjoy your new creation!
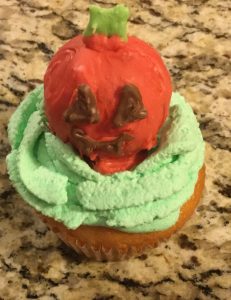
Carved Pumpkin
 <a href="https://conantcrier.com/byline/michelle-zhang/" rel="tag">Michelle Zhang</a> | Conant Crier
 Material
- Undecorated Cupcakes
- Undecorated Cake Pops
- Orange Candy Melts
- Brown Candy Melts
- Green Candy Melts
- Whipped Cream(see bottom for recipe)
- Food Coloring
- Two Bowls
- Ziploc Bags
- Parchment Paper
- Toothpick
Procedure
1. Melt some orange candy melts (directions in step 1 of Bat Pops) in a bowl and roll a cake pop in it. Make sure that the cake pop is completely covered. Remove it from the bowl and place it on a piece of parchment paper to dry.
2. Melt the brown candy melts in a Ziploc bag. Do the same with the green candy melts.
3. Cut off a small corner of each bag so you can use them like a piping bag.
4. Use the green candy to pipe a rectangle on parchment paper.
5. Use the brown to pipe out the eyes and mouth of a carved pumpkin on a piece of parchment paper.
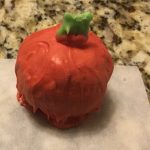
6. Once the orange, brown, and green candy have dried, dip one end of the green rectangle into melted orange candy and attach it to the top of an orange coated cake pop. This is the stem of the pumpkin.
 <a href="https://conantcrier.com/byline/michelle-zhang/" rel="tag">Michelle Zhang</a> | Conant Crier
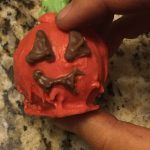
 7. Using a toothpick, smear melted orange candy onto the back of the dried brown candy and attach it to the front (the side the stem is facing) of the pumpkin so that it forms a face.
 <a href="https://conantcrier.com/byline/michelle-zhang/" rel="tag">Michelle Zhang</a> | Conant Crier
 8. Put some whipped cream into the second bowl and mix in two to three drops of green food coloring. Put this in a Ziploc bag and cut of a medium-sized corner of the bag.
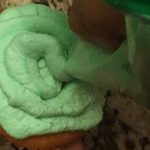
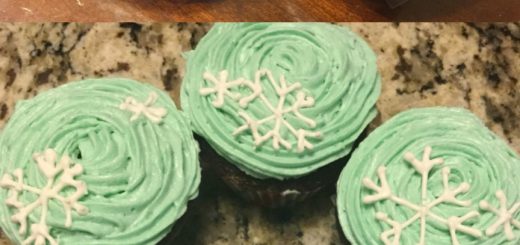
9. Pipe the green colored whipped cream onto a cupcake in a swirling manner, going from outside to inside.
 <a href="https://conantcrier.com/byline/michelle-zhang/" rel="tag">Michelle Zhang</a> | Conant Crier
 10. Place a pumpkin cake pop in the middle of the swirl.
11. Then just sit back and let your eyes and stomach feast on your Carved Pumpkin!
Whipped Cream
Materials
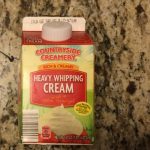
- One Carton of Heavy Cream
- 1 Teaspoon Vanilla
- 2 Tablespoons Sugar
Procedure
1. Pour one carton of heavy cream into a large bowl.
2. Whisk or beat with an electric mixer on medium.
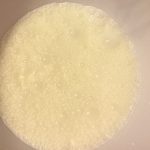
3. Once the heavy cream develops a layer of bubbles, add the vanilla and sugar.
 <a href="https://conantcrier.com/byline/michelle-zhang/" rel="tag">Michelle Zhang</a> | Conant Crier
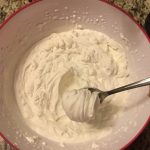
 4. Continue whisking or beating until the whipped cream becomes stiff.
 <a href="https://conantcrier.com/byline/michelle-zhang/" rel="tag">Michelle Zhang</a> | Conant Crier
 5. Taste test the whipped cream. If it is not sweet enough, just mix in more sugar.



Recent Comments